How to Configure & Send Apple Push Notifications using PushSharp
The tutorial requires that you use a Mac, and that you have an Apple Developer account, with an App ID already setup.
- Navigate to https://developer.apple.com/membercenter/index.action and Login.
- Click on Certificates, Identifiers & Profiles.

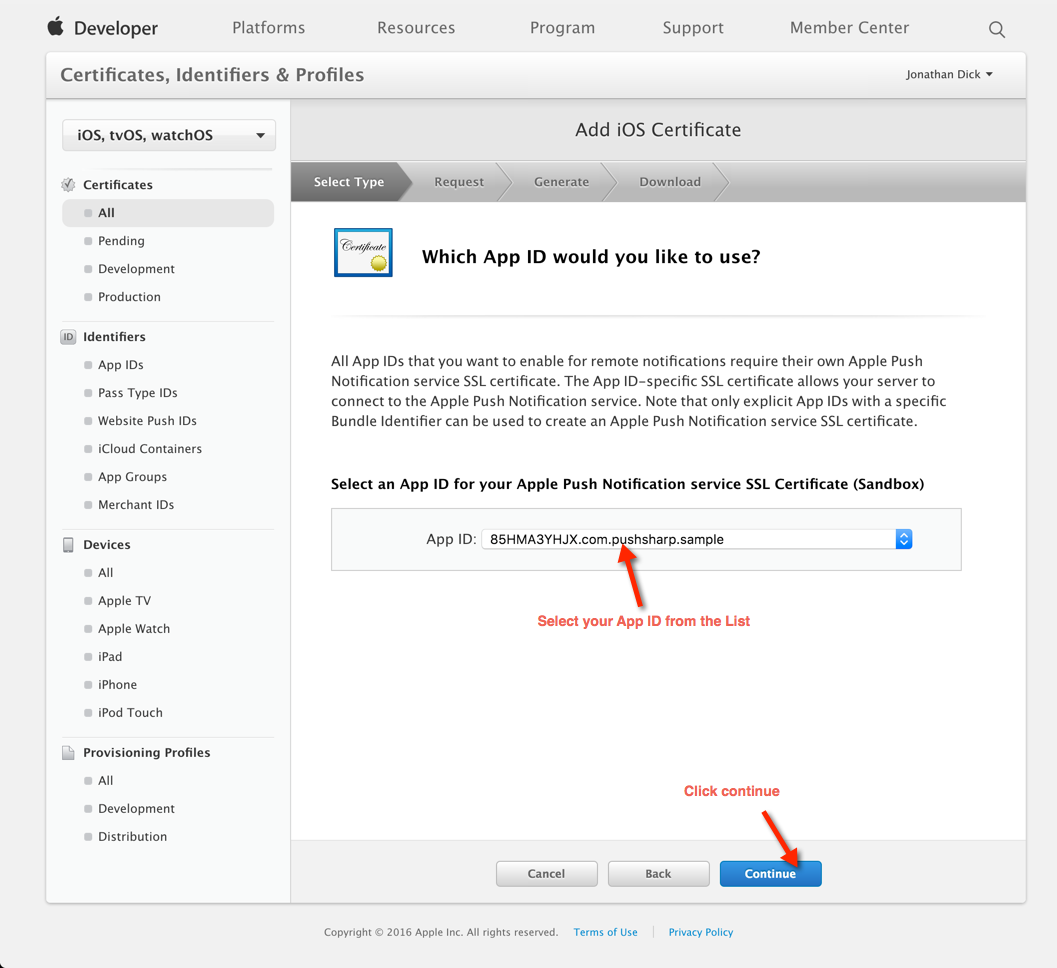
- Select your App ID from the list (You must have already created your App ID).
- Click Continue.
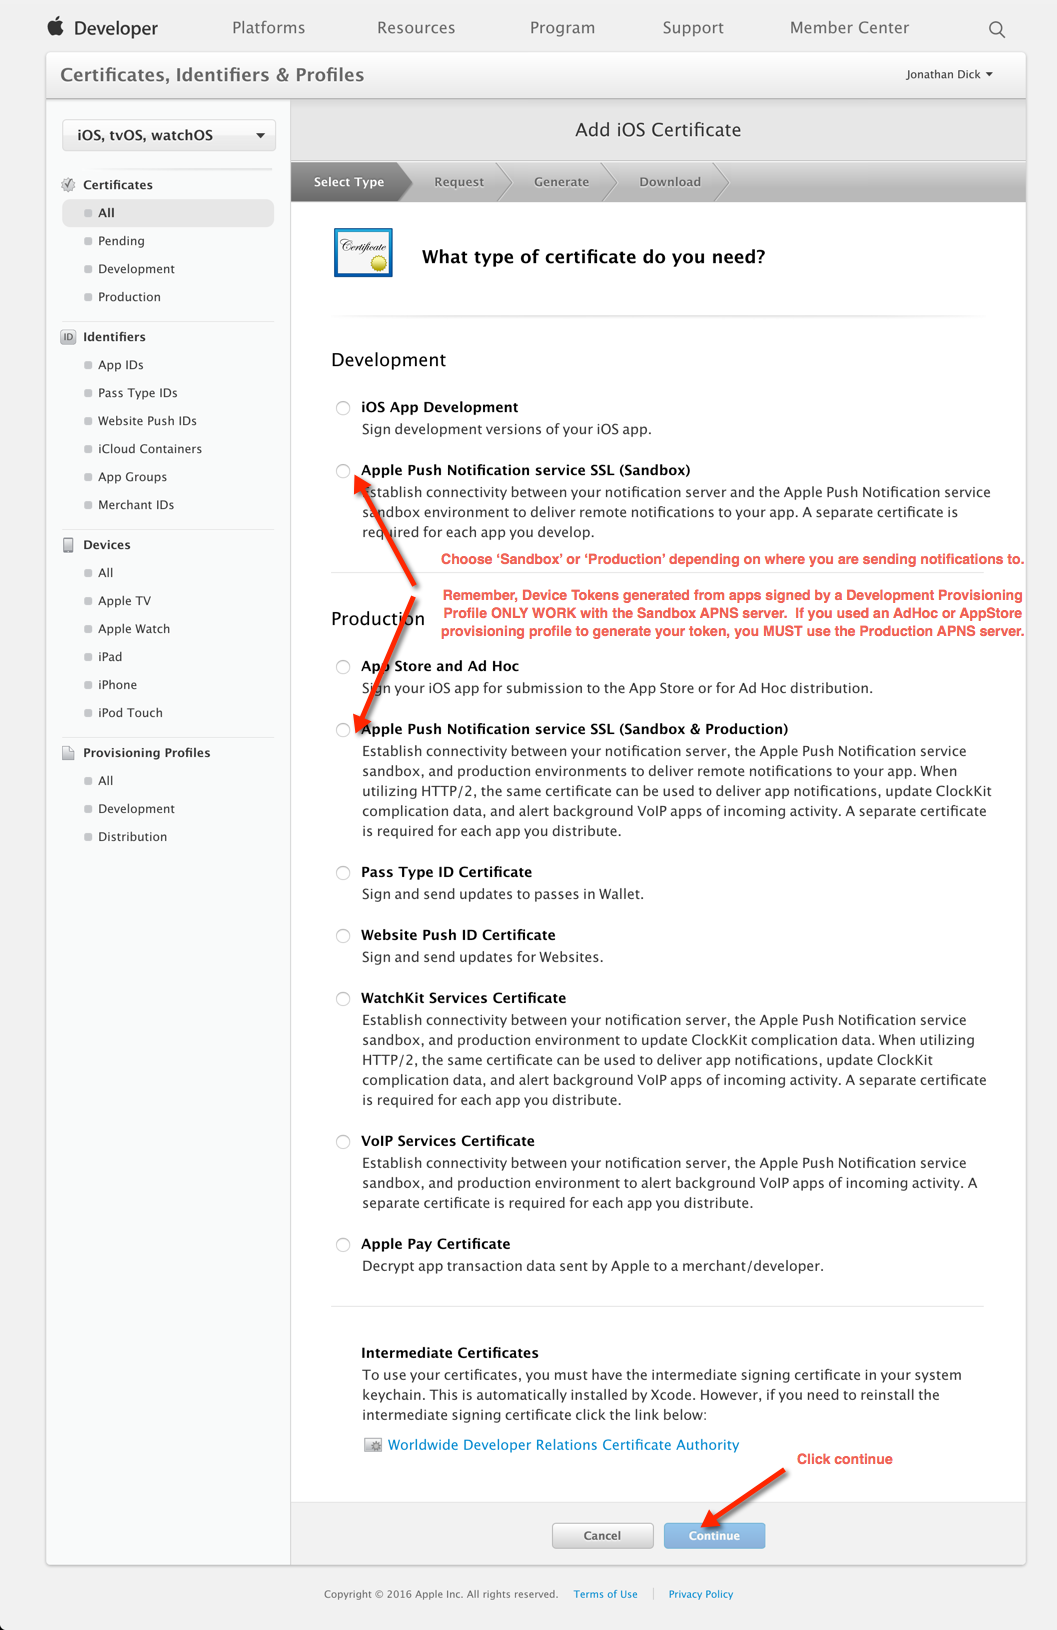
- Choose either Apple Push Notification service SSL (Sandbox) or Apple Push Notification service SSL (Sandbox & Production) as the certificate type, depending on which server you need to connect to.
- Click Continue.
It's important to choose the correct type of certificate here for what you plan on doing.
A Device Token generated by an app signed with a Development Provisioning Profile is only valid for use with the Sandbox APNS server.
A Device Token generated by an app signed with an AdHoc or AppStore Provisioning Profile is only valid for use with the Production APNS server.
NOTE: Some users have reported issues with notification delivery using the combined Apple Push Notification service SSL (Sandbox & Production) certificate when trying to send notifications to the Sandbox APNS server.
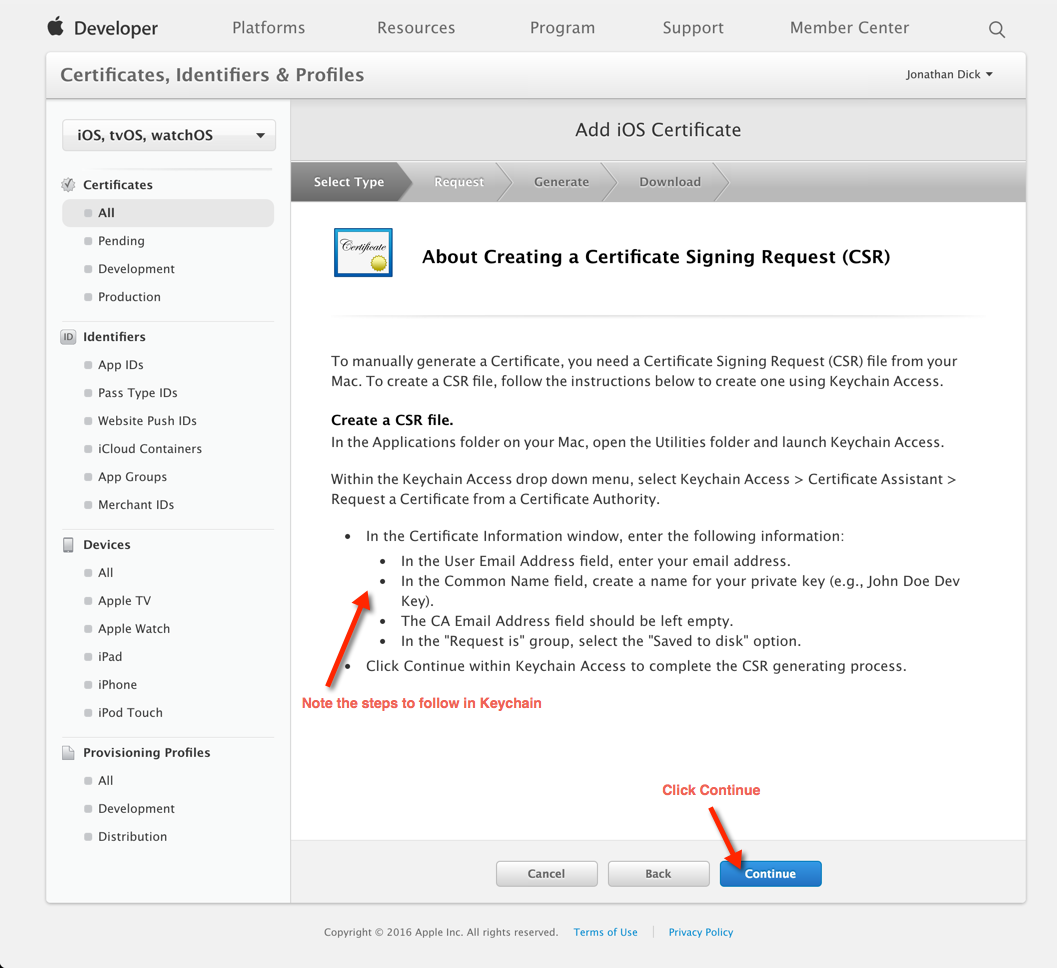
- Note the information about creating a CSR (Certificate Signing Request).
- Click Continue.
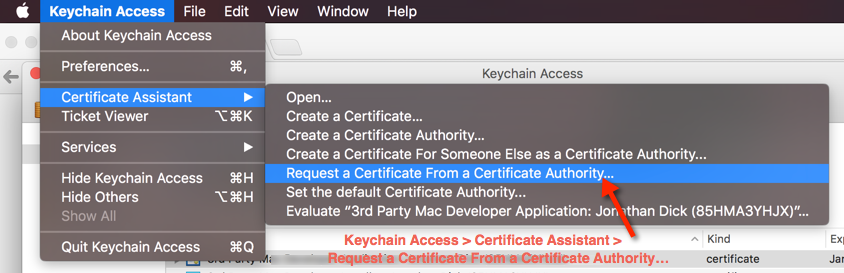
- Open the Keychain Access app.

- Click the Keychain Access menu bar item
- Open the Certificate Assistant menu sub item
- Click the Request a Certificate From a Certificate Authority... menu sub item
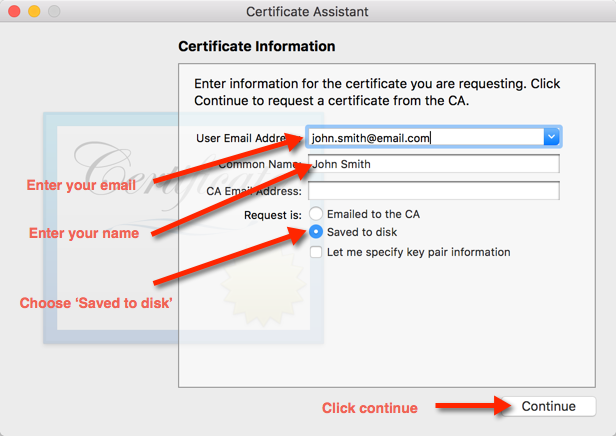
- Enter your email address (to be safe, make it the same as your Apple ID developer account email address).
- Enter a Common Name (eg: your name)
- Choose Request is: Saved to disk
- Click Continue.
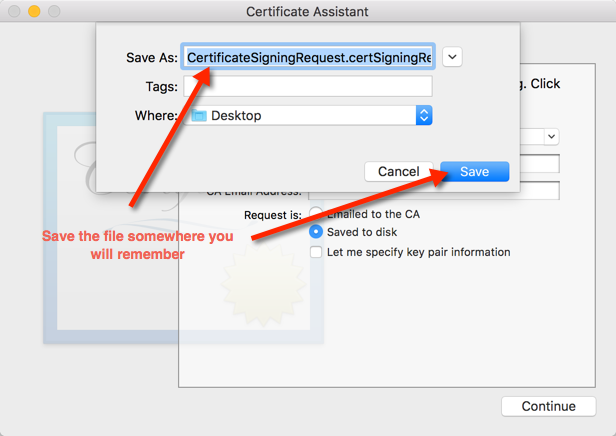
- Pick a location and filename to save the request to
- Click Save.
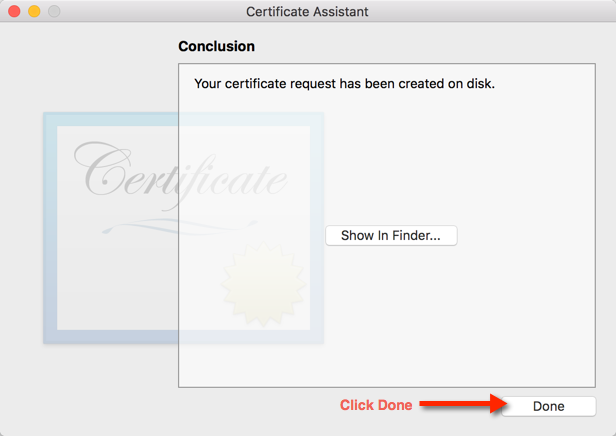
- Click Done.
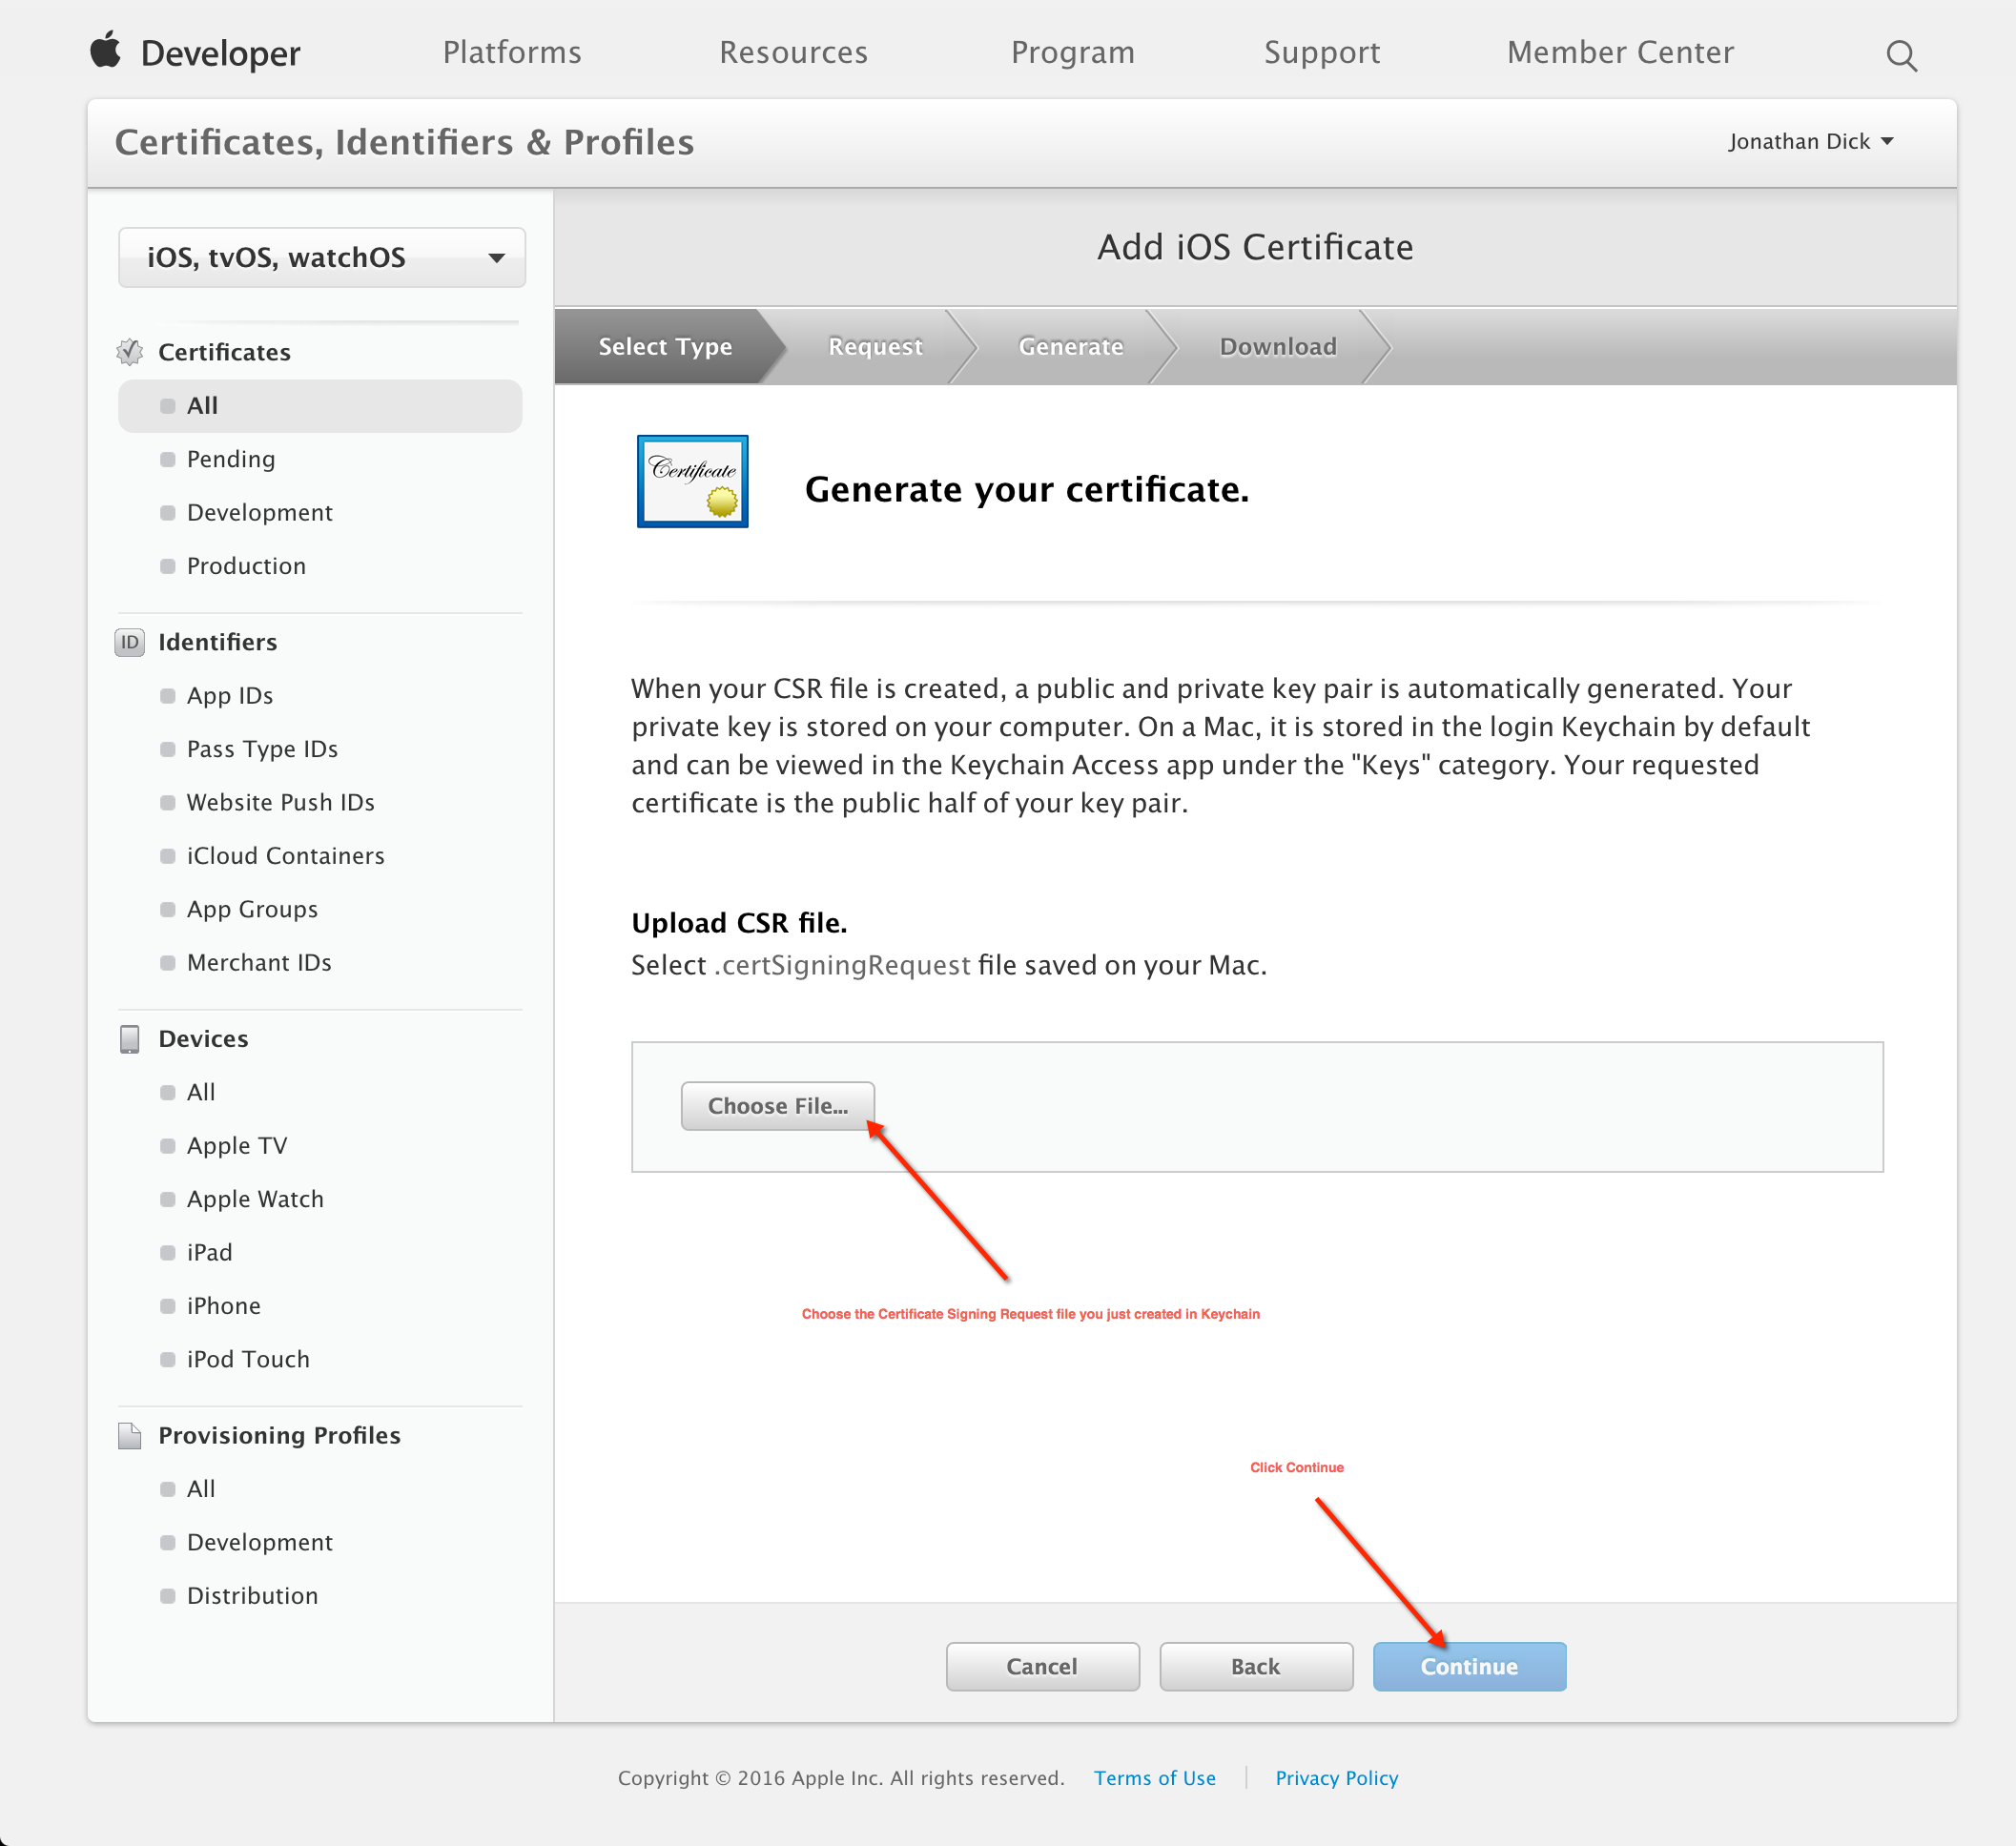
- Switch back to your browser.
- Click Choose File...
- Select the Certificate Signing Request file you just created and saved.
- Click Continue.
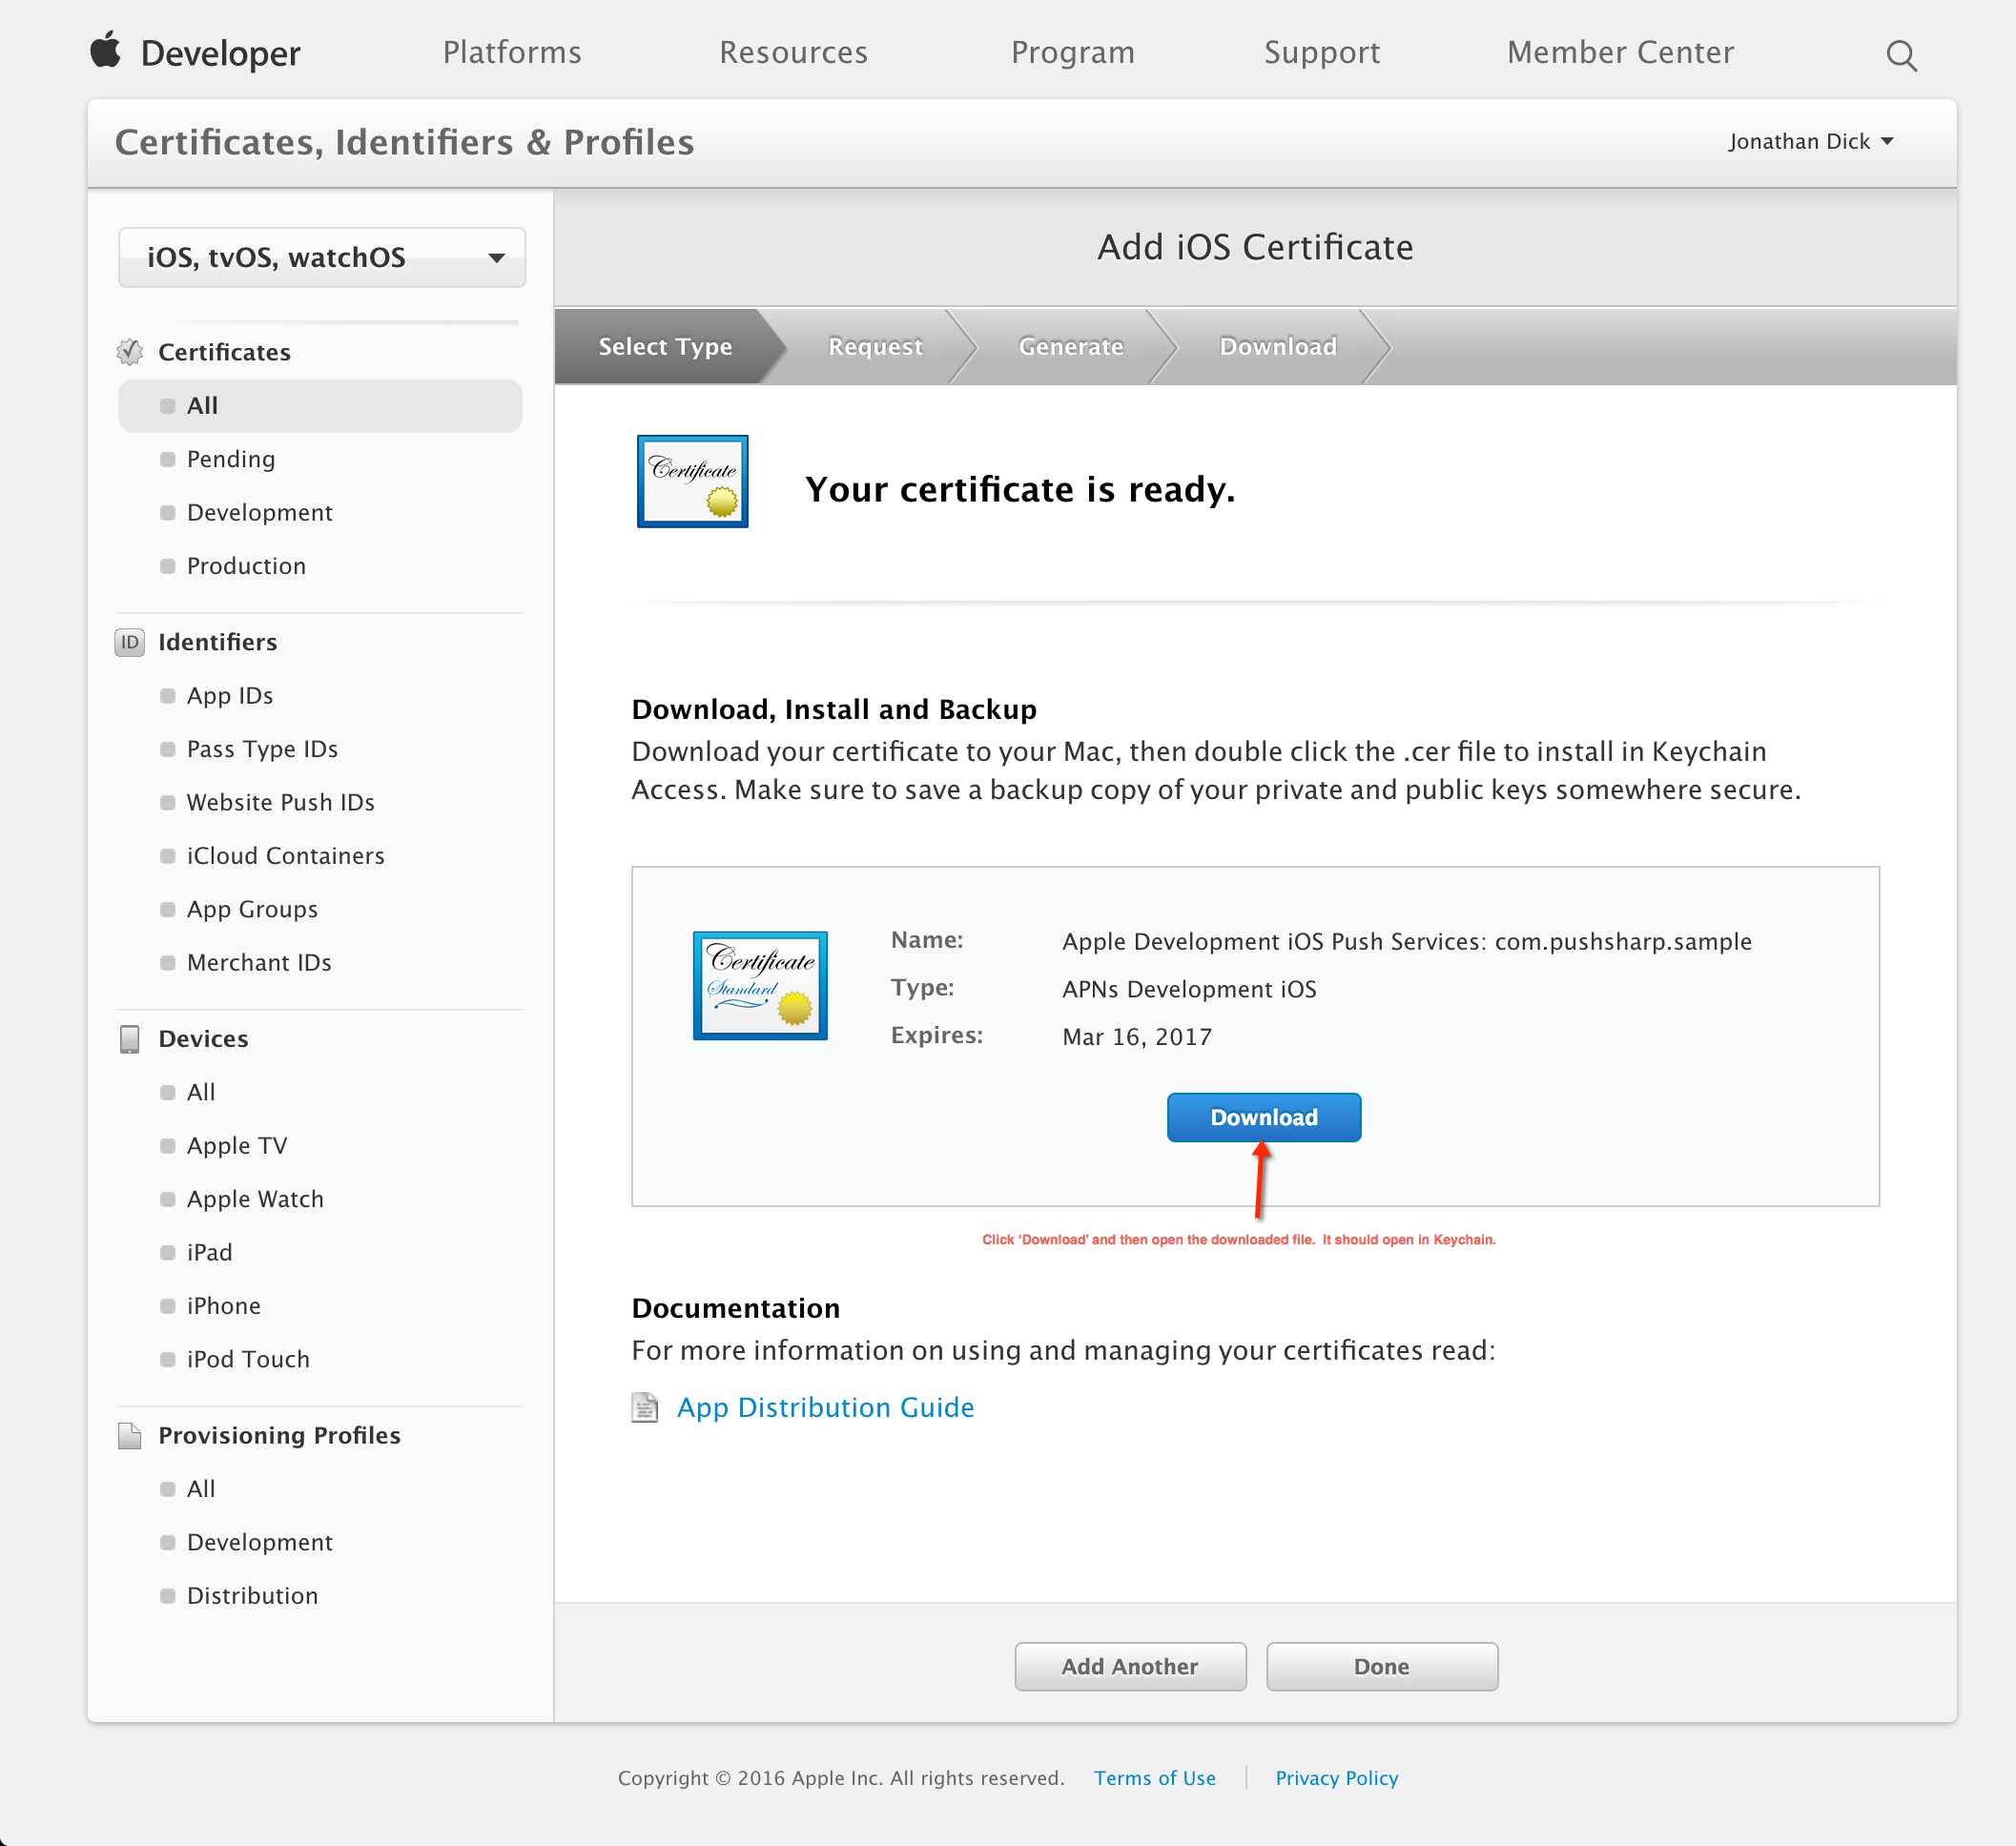
- Your certificate should be ready.
- Click Download to download the certificate.
- Open the downloaded certificate file (it should automatically open in Keychain Access, otherwise open it manually in Keychain Access)
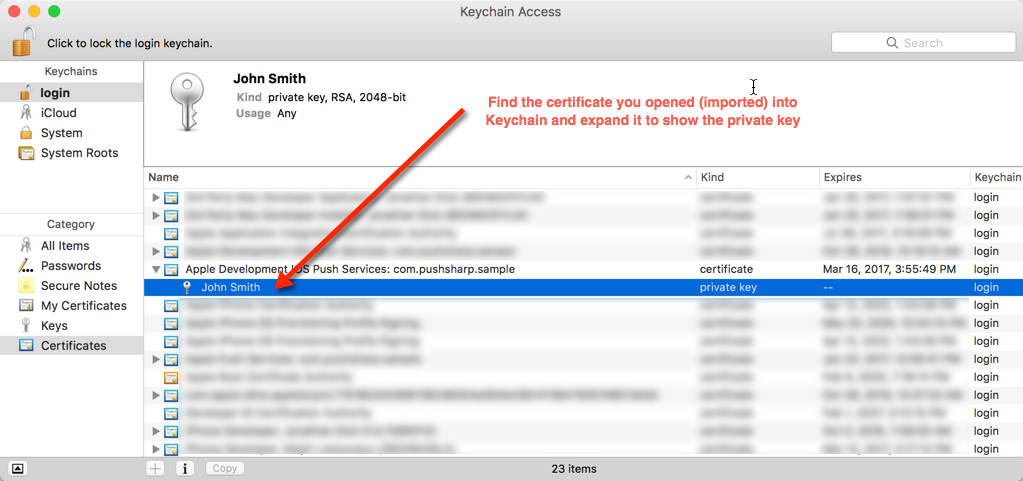
- Find the certificate you just opened/imported in Keychain Access
- Expand the certificate to show the Private Key
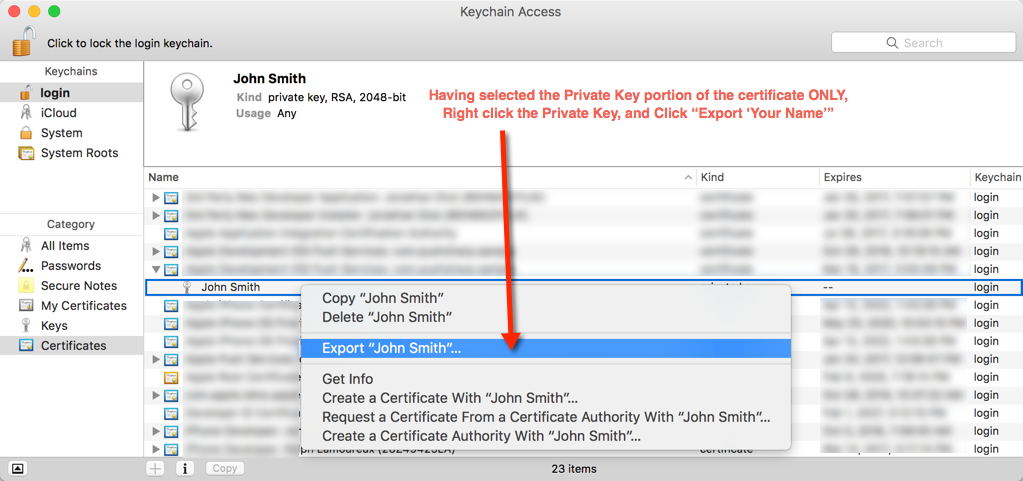
- Select only the Private Key portion of the certificate
- Right click the Private Key portion of the certificate
- Click Export "Common Name"... on the popup menu.
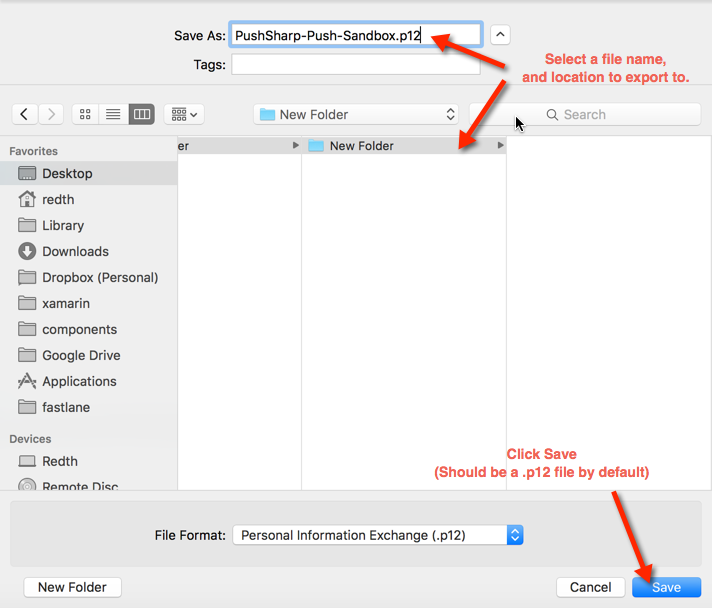
- Choose a location and filename to export the .p12 file to
- Click Save.
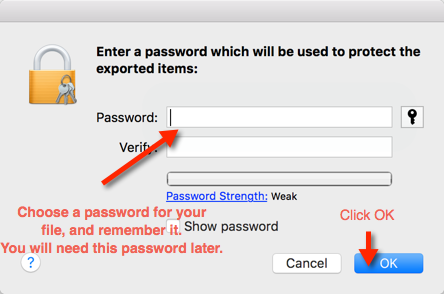
- Optionally choose a password for the .p12 file to protect its private key contents.
- Click OK.
You should now have a .p12 file that contains the private key for connecting to Apple's APNS servers. This certificate file can be used in PushSharp with the password for it.
Congratulations, you did it!