Android Custom Notification Layout
Open your application in Android Studio. Select File->New->XML->Layout XML file:

Enter any layout name. Your file will be created in the folder app/res/layouts:

Even if you have no experience with Android Layouts, it doesn't take much to figure out the basics. You'll mostly be adding <TextView />, <ImageView /> and <Button /> elements. The key thing to be aware of is the android:id of these elements and how these are referenced from BackgroundGeolocation.notification configuration: your android:id must be prefixed with the word notification (eg: notificationText). There is one exception: applicationName, which the plugin will automatically render your Android application name.
| Notification parameter | Layout element android:id
|
|---|---|
notification.title |
notificationTitle |
notification.title |
notificationTitle |
notification.title |
notificationTitle |
As a starting-point for your custom layout, copy the following content into your new file:
<?xml version="1.0" encoding="utf-8"?>
<LinearLayout xmlns:android="http://schemas.android.com/apk/res/android"
    xmlns:tools="http://schemas.android.com/tools"
    android:layout_width="match_parent"
    android:layout_height="135dp"
    android:gravity="start"
    android:adjustViewBounds="true"
    android:orientation="vertical"
    android:padding="15dp">

    <LinearLayout
        android:layout_width="match_parent"
        android:layout_height="wrap_content"
        android:layout_marginBottom="15dp"
        android:gravity="center"
        android:orientation="horizontal">

        <ImageView
            android:id="@+id/notificationSmallIcon"
            android:layout_width="16dp"
            android:layout_height="16dp"
            android:tint="@android:color/background_dark"
            tools:srcCompat="@tools:sample/avatars" />

        <TextView
            android:id="@+id/applicationName"
            android:layout_width="match_parent"
            android:layout_height="match_parent"
            android:paddingLeft="10dp"
            android:text="applicationName"
            android:textAppearance="@style/TextAppearance.Compat.Notification.Title"
            android:textColor="#888888"
            android:textSize="12sp" />
    </LinearLayout>

    <TextView
        android:id="@+id/notificationTitle"
        style="@style/TextAppearance.Compat.Notification.Title"
        android:layout_width="match_parent"
        android:layout_height="wrap_content"
        android:text="notificationTitle"
        android:textSize="14sp" />

    <TextView
        android:id="@+id/notificationText"
        style="@style/TextAppearance.Compat.Notification.Line2"
        android:layout_width="match_parent"
        android:layout_height="wrap_content"
        android:text="notificationText"
        android:textSize="14sp" />

    <LinearLayout
        android:layout_width="match_parent"
        android:layout_height="wrap_content"
        android:layout_weight="1"
        android:gravity="right"
        android:orientation="horizontal">

        <Button
            android:id="@+id/notificationButtonFoo"
            style="@style/Widget.AppCompat.Button.Small"
            android:layout_width="60dp"
            android:layout_height="40dp"
            android:text="FooA" />

        <Button
            android:id="@+id/notificationButtonBar"
            style="@style/Widget.AppCompat.Button.Small"
            android:layout_width="60dp"
            android:layout_height="40dp"
            android:text="Bar" />
    </LinearLayout>
</LinearLayout>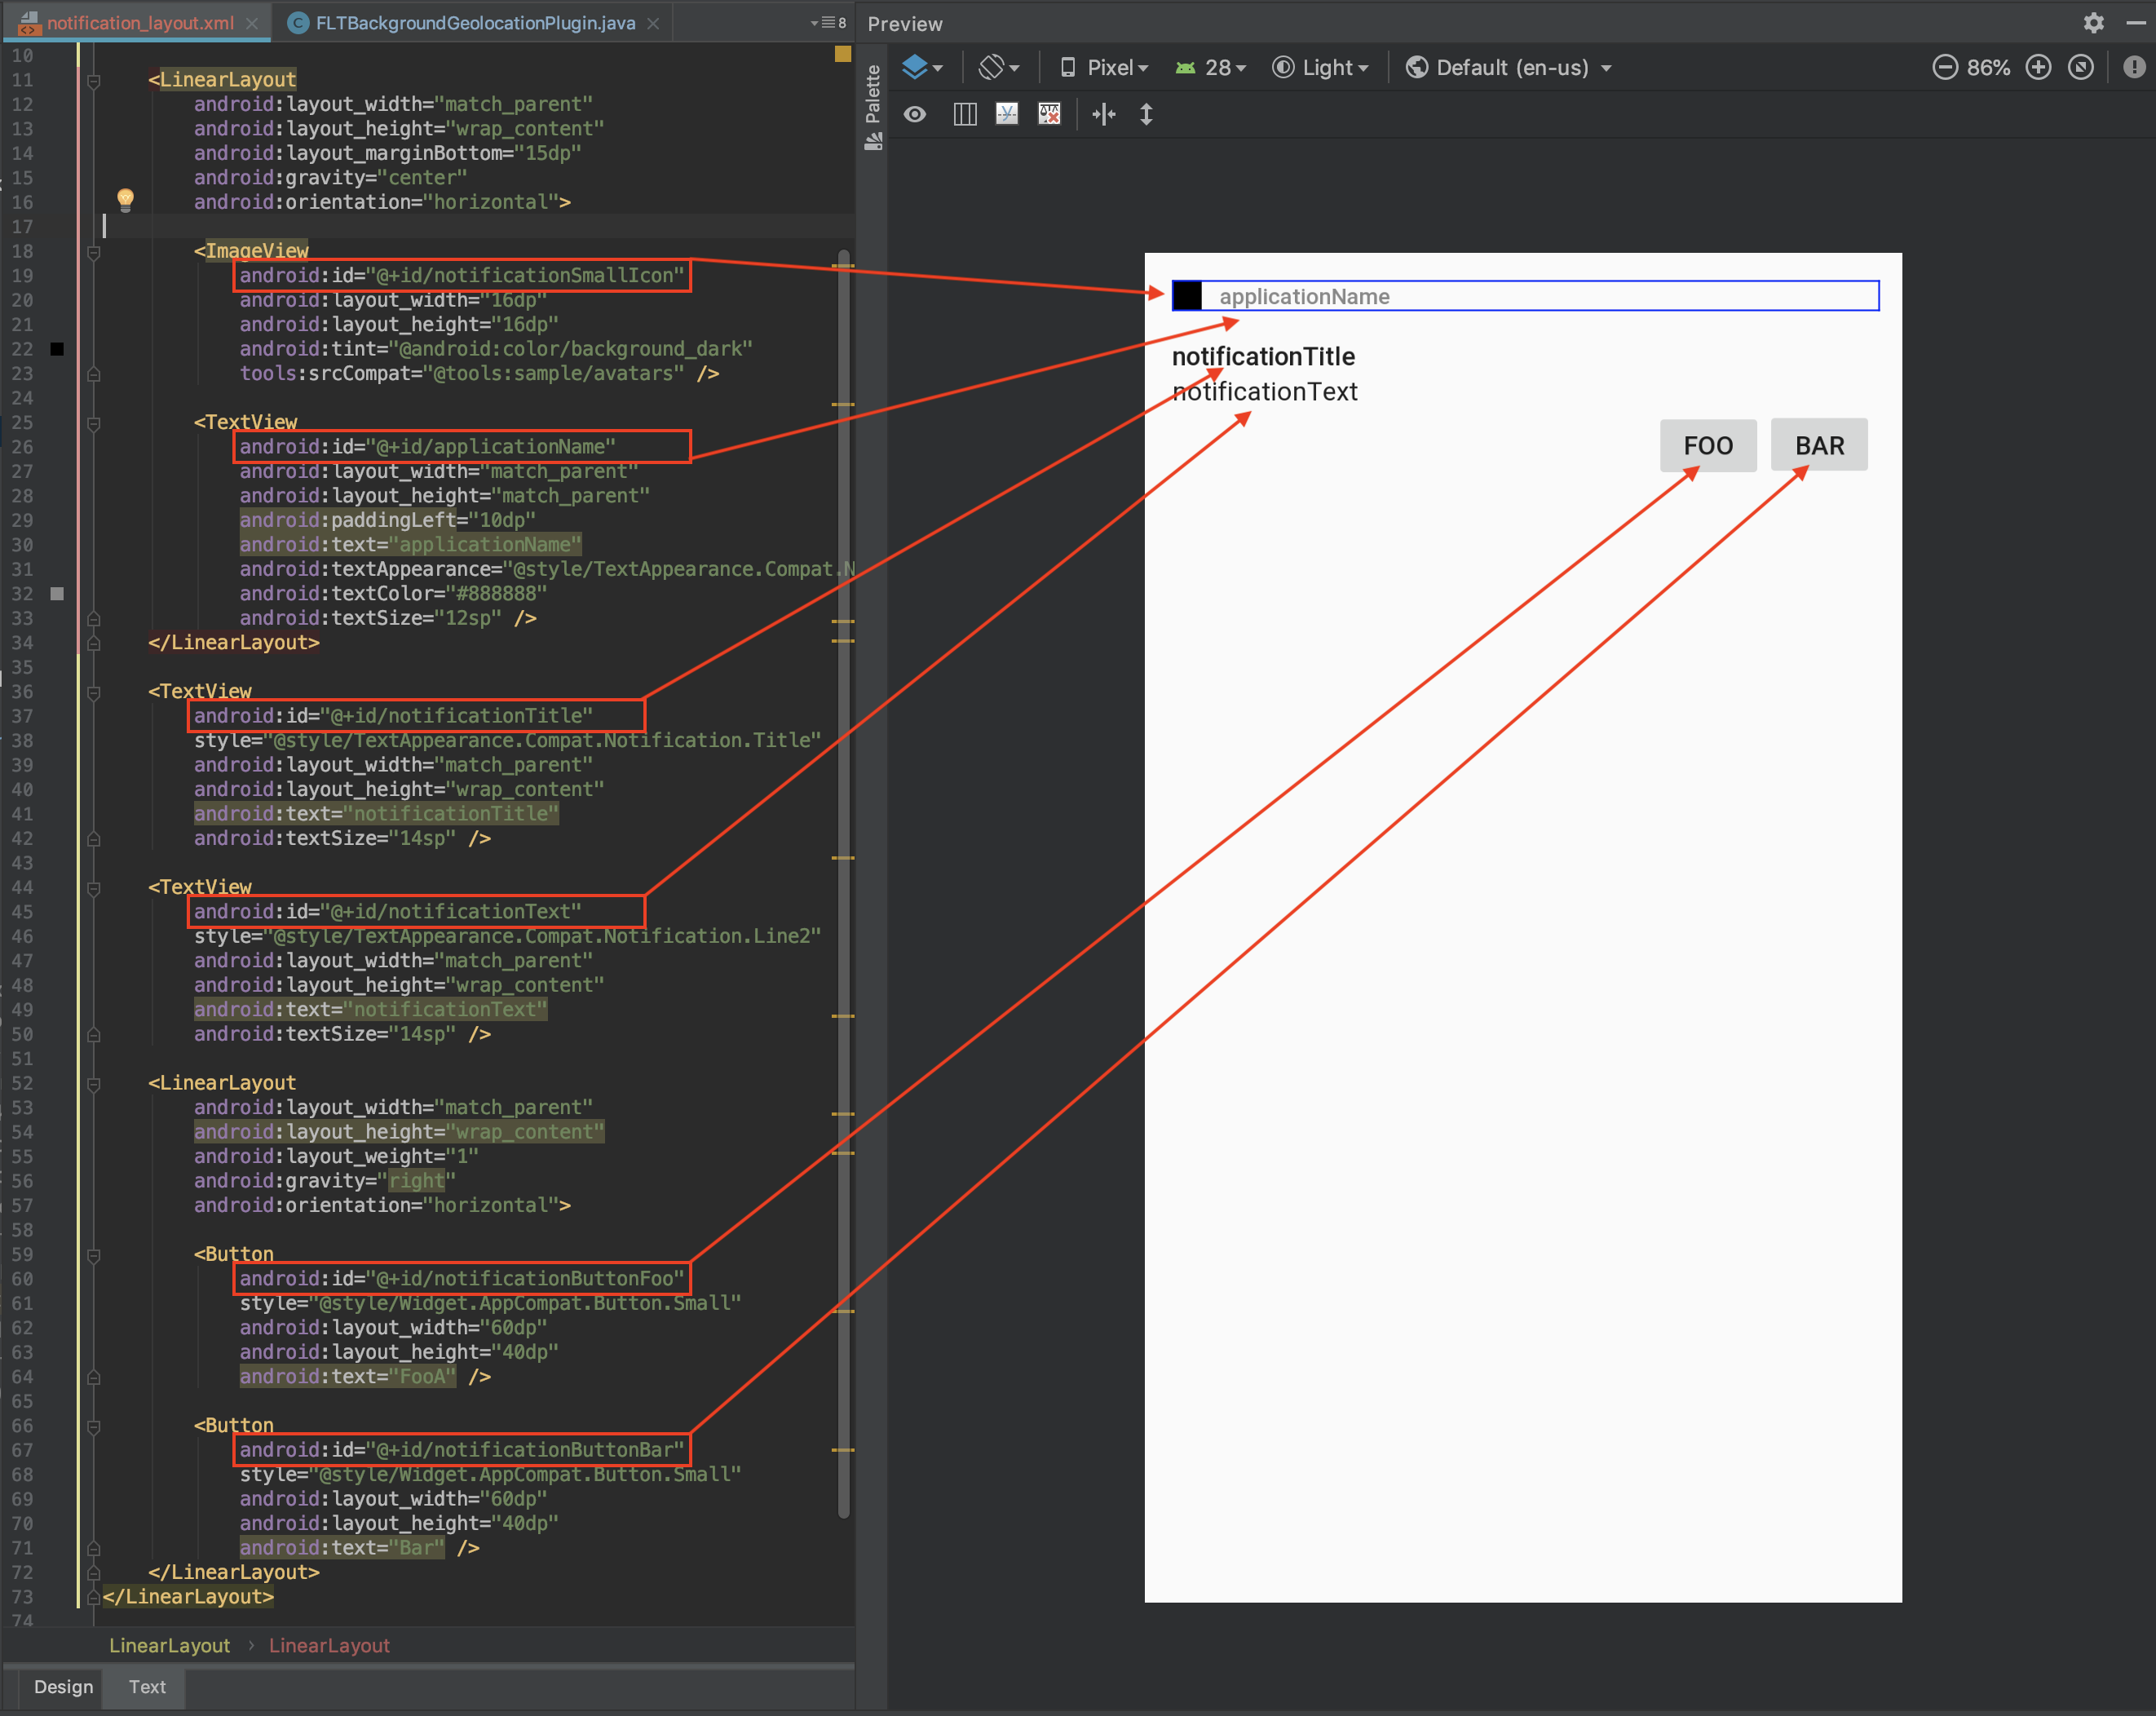
BackgroundGeolocation.ready({
  notification: {
    title: 'The title',
    text: 'The text',
    layout: 'notification_layout',
    actions: [
      'notificationButtonFoo',  // <-- register button click-listeners
      'notificationButtonBar'
    ],
    strings: {
      'myCustomTextBox1': 'custom TextBox element'
    }
  }
});

// Listen to custom notification button clicks (notification.actions)
BackgroundGeolocation.onNotificationAction((buttonId) => {
  console.log('[onNotificationAction] - ', buttonId);
  switch(buttonId) {
    case 'notificationButtonFoo':
      // Handle button click on [Foo]
      break;
    case 'notificationButtonBar':
      // Handle button click on [Bar]
      break;
  }
});